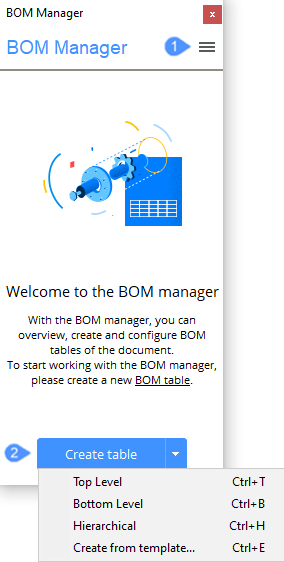
BOM manager panel
The BOM Manager panel allows you to browse, create and edit bills of materials (BOMs) in the current drawing.
The configuration of a bill of materials can be saved as a template file and reused later in other drawings.
With the Bill of Materials Manager, you can:
- Browse existing bills of materials in the drawing.
- Create a new bill of materials using either a standard type (such as top-level, bottom-level, hierarchical) or an existing BOM template.
- Edit bills of materials:
- Add or remove columns (includes formula columns).
- Move selected columns to new positions.
- Rename the columns.
- Configure how the BOM table is sorted.
- Configure the footer value for each individual column.
- Configure the units and how they are displayed for each column.
- Configure the width of each column with column properties.
- Configure the visibility of each individual column.
- Filter the components with a filter expression.
- Change the title of both the title row and the footer row.
- Search for components in the table.
- Highlight and select component instances.
- Save the BOM configuration as a template file.
- Load a BOM table configuration from a template file.
- Place the BOM table in a drawing.
- Delete BOM tables.
A Mechanical or Ultimate license is required to modify or create bills of materials. However, the manager is available with a Pro license.
- Menu
- Create a table
Menu
Opens the main menu.
- New BOM
- Opens a submenu, which includes:
- Copy the current table: adds a new BOM table using the template of the current table.
- BOM tables in document
- opens a submenu.
- Go to first table: switches to the first BOM table in the document.
- Go to previous table: Switches to the previous BOM table in the document.
- Go to next table: Switches to the next BOM table in the document.
- Go to last table: Switches to the last BOM table in the document.
-
<Name of the BOM>: Switches to the corresponding BOM table in the document.
- Place/Update BOM table
- Starts the interactive placement of the table in the drawing. If the table is already in the drawing, this tool will update the table.
- Export to CSV
- Saves the content of the current table to a CSV file.
- Replace from template…
- Replaces the current BOM configuration with the one from the template.
- Save as template…
- Specify the location of the BOM template file.
- Delete current BOM
- Deletes the current BOM table from the document.
- Set filter
- Opens the Filter Configuration dialog box, which allows you to specify the filter configuration.
- Selection set
- Opens a submenu.
- Entire model: The BOM table will be created for the entire model.
- Subassembly: The BOM table will be created for a selected instance of a subassembly.
- Drawing view: The BOM table will be created for the parts selected for the corresponding drawing view, regardless of their visibility in the viewport.
- Layout viewport: The BOM table will be created for the selected layout viewport.
- Custom selection: The BOM table will be created only for the selected parts.
- Show selection: Shows the current selection for the BOM table.
- Edit: Allows you to edit the selection.
- Refresh
- Updates the current BOM and the list of all BOM tables in the drawing.
- Insert column after
- Inserts a column from the Column selector after the selected column.
- Insert column before
-
Inserts a column from the Column selector before the selected column.
Note: If no column is selected, a new column is added after the last column in the table.
- Insert formula column
- Opens a formula editor, which allows you to configure a formula column.
- Insert template column
- Opens a template editor, which allows you to configure a template column.
- Edit evaluated column
- Allows you to edit the selected formula or template column.
- Delete column
- Removes the selected column from the table.
- Move column left
- Moves the selected column(s) one column to the left.
- Move column right
- Moves the selected column(s) one column to the right.
- Make column visible
- Shows the selected column in the associated table in the drawing.
- Make column invisible
- Removes the selected column from the associated table. Invisible columns remain visible in the BOM manager but are marked with a diagonal hatch pattern in the background.
- Associated table
- Opens a submenu.
- Zoom to: Zooms to the table. If necessary, sets the table layout as the current one.
- Select: Selects the table. If necessary, sets the table layout as the current one.
- Delete: Deletes the table from the document.
- Detach: Detaches the table. The table in the document is no longer updated when the BOM table is modified.
- Footer
- Opens a submenu, for each of the selected columns.
- No footer: Removes the footer.
- Sum: Displays the sum in the footer.
- Average value: Displays the average in the footer.
- Minimal value:: Displays the minimum value in the footer.
- Maximal value:: displays the maximum value in the footer.
- Sorting
- Opens a submenu.
- Automatic order:Sorts the table automatically.
- Natural order: Sort the table by the natural order of component instances in the document.
- Ascending order: Sorts the selected columns in ascending order.
- Descending order: Sorts the selected columns in descending order.
- Aggregate function
- Opens a submenu.
- No function: Removes the aggregate function.
- Sum: Displays the sum of all values in the group.
- Average value: Displays the average of all values in the group.
- Minimal value: Displays the minimum of all values in the group.
- Maximal value: Displays the maximum of all values in the group.
- Concatenation: displays a concatenation of all values in the group in ascending order, separated by a specified delimiter.
- Concatenation with count: Displays a concatenation of all values in the group with their corresponding number of encounters in ascending order. Value and count pairs are separated by a specified delimiter.
- Disable/Enable warnings
- Controls the display of warning messages during the creation or update of BOM tables.
Create a table
- Top level
- Creates a new Top level BOM.
- Bottom level
- Creates a new Bottom level BOM.
- Hierarchical
- Creates a new Hierarchical BOM.
- Create from template
- Opens a dialog box, which allows you to select a BOM Table template (*.BOM) file.
To start working with the BOM manager, you will have to create a new BOM table.
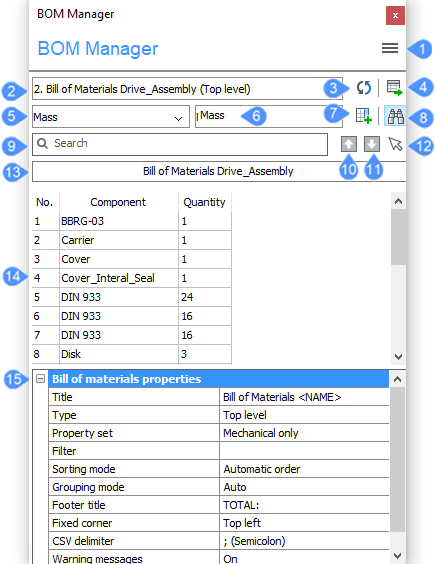
- Menu
- BOM Selector
- Refresh
- Place/update table
- Category selector
- Column selector
- Insert column after
- Find
- Search
- Find previous
- Find next
- Select all found
- BOM title
- BOM table
- BOM and Column Properties
- BOM Selector
-
Selects the current BOM table. The selection is stored in the drawing. When the drawing is closed and reopened, the selected BOM is restored in the manager. When selected, the table is updated in the current state of the drawing.
- Refresh
-
Updates both the current BOM and the list of all BOM tables in the drawing.
- Place/update table
-
Starts the interactive placement of a table in a drawing. If the table has already been placed in the drawing, it updates it. All edit operations automatically update the associated table in the drawing.
- Category selector
- Select the category of the properties that are displayed in the column selector. The category can be added to the current BOM pressing button no. 7.
- Column selector
-
Select the column to add to the current BOM.
You can type here the formula for a formula field. To add a formula, type an expression starting with ”=”. To add a template expression type “$”, to refer columns, use <>. For example, to refer to the Mass column you will type: “=<Mass>”.
When you add a formula field and press button no. 7 the Formula column_1 dialog box will appear.
- Insert column after
-
If a column is selected, it will insert the column from the Column selector after the selected column in the table.
If no columns are selected, the new column will be inserted after the last column in the table.
- Find
-
Toggles the search field on and off. When you toggle on this button, buttons no. 9, 10, 11 and 12 will appear.
If you click on the BOM Manager panel, you can toggle the search field using CTRL+F.
- Search
-
Type a string to search and press Enter; wildcards are supported.
- Find previous
-
Selects the previous match on the BOM table.
You can also use Shift+F3.
- Find next
-
Selects the next match in the BOM table.
You can also use F3.
- Select all found
-
Selects all the items searched in the search field.
- BOM title
-
Displays the title of BOM table. You can type the name you want instead of <NAME>. Press Enter or exit the field to apply the changes.
- BOM table
-
Displays the content of the BOM table.
Right-click a column label offers additional tools:- Add template column from selected: opens a template editor to configure a new template column. The selected columns will be automatically added to the template expression.
- Column role: opens a submenu.
- Number: the column will be used as a source of numbers by the bmBalloon command.
- Name: the column will be used as a source of names by the bmBalloon command.
- Quantity: the column will be used as a source of quantities by the bmBalloon command.
- Regular: the column will have no specific role.
- Format: opens the Format dialog box, which allows you to specify the format for the selected column(s).
- Set column filter: opens the Column Filter dialog box, which allows you to configure the column filter.
- Fit column(s): fits the width of the selected column(s) to their content.
- Fit all columns: fits the width of
all columns to their content. Note: The column width automatically fits the content unless the width has been changed manually.
Right-click on cells offers additional tools:- Zoom to: zooms to the select part(s) in the model.
- Select: selects the part(s). Replaces an existing selection.
- Add to Selection: adds part(s) to the selection.
- Remove from Selection: removes the parts from the selection.
- Remove highlighting: removes highlighting.
- BOM Properties
- Displays the BOM and columns Properties. The columns properties will appear after you insert a column on the BOM table.