Insert table dialog box
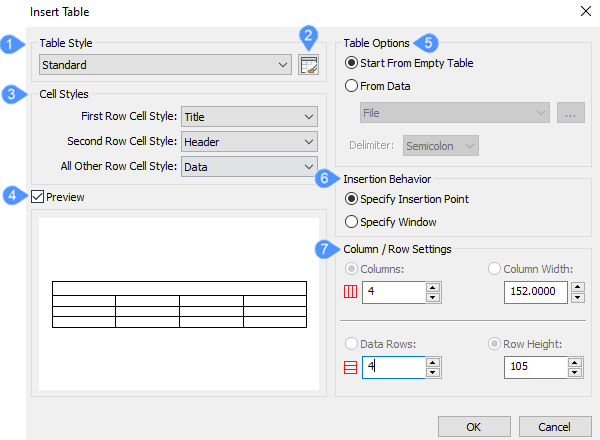
The Insert table dialog box allows you to create a table entity in the drawing either from scratch or from data in an external file or a data link.
- Table Style
- Table Style Explorer
- Cell Styles
- Preview
- Table Options
- Insertion Behavior
- Column / Row settings
Table Style
Chooses an existing table style from the drop-down list.
Table Style Explorer
Allows you to create or edit table styles. Opens the Table Styles from the Drawing Explorer dialog box.
Cell Styles
- First Row Cell Style: chooses a sub-style from the drop-down list, which by default is Title. A Title row is the topmost row of the table.
- Second Row Cell Style: chooses a sub-style from the drop-down list, which by default is Header. A Header row is the first row of a column.
- All Other Row Cell Style: chooses a sub-style from the drop-down list, which by default is Data. A Data row is all other rows in the table.
Preview
Displays a preview of the table depending on the options and settings you set in this dialog box.
Table Options
- Start from Empty Table: creates a new, empty table with the parameters listed below.
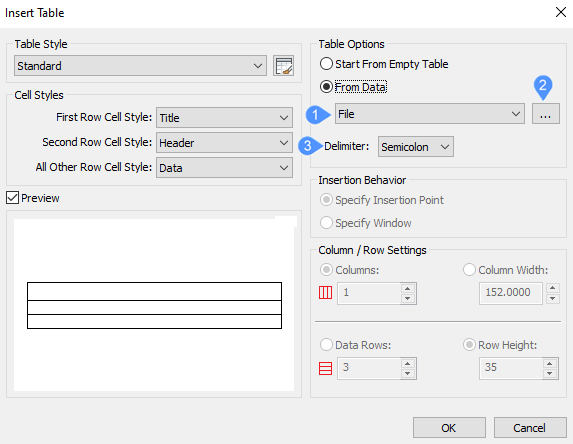
- From Data: reads data from a file or a datalink.
- File
- Open
- Delimeter
- File
Read data for the new table from a file.
- Open
Displays the Open dialog box from where you will select the file.
- DelimeterSpecifies the delimiter character used to separate fields in CSV data files. Select from the drop-down list the delimiter you want to use.Note: Available only for the File option.
- DataLink
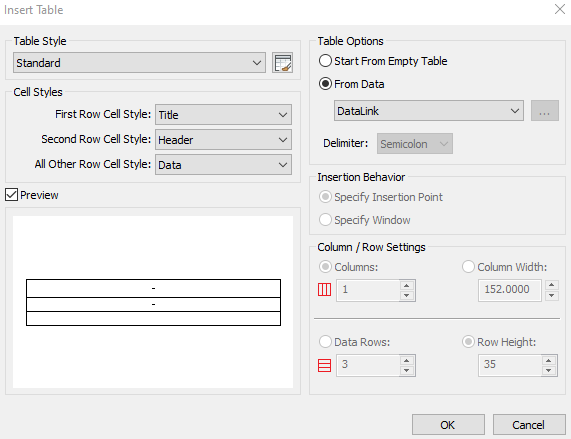
When you select to read data from a datalink the Datalink Manager dialog box opens.
Insertion Behavior
- Specify Insertion Point: specifies where the upper-left corner of the table will be inserted in the drawing.
- Specify Window: specifies the area that will be used by the table, this is useful when you need the table to fit a specific are, such as in a revision table or title block.
Column / Row settings
(This option is available only when you create a new empty table.)
Specifies the number of columns or rows and the cell width or height.
Choose one of:
- Columns: specifies the number of columns in the table
- Column Width: specifies the initial width of all columns
And choose one of:
- Data Rows: specifies the number of data rows in the table; the title and header rows are added automatically by the program
- Row Height: specifies the initial height of all rows.
The number of columns and rows and size of cells can be adjusted later, after the table is inserted.