Custom properties
Commands
BIMPROPERTIES
About

For more information about this command, visit the Command Reference article BIMPROPERTIES.
To learn more about creating user-defined quantity definitions, visit the Procedure article for Customizing BIM Quantities.
Using the BIM properties dialog box
- Open the BIM Properties dialog box by typing
BIMPROPERTIES in the Command line. The dialog box displays for specifying
and editing properties of BIM projects. The following illustration shows the
dialog box.
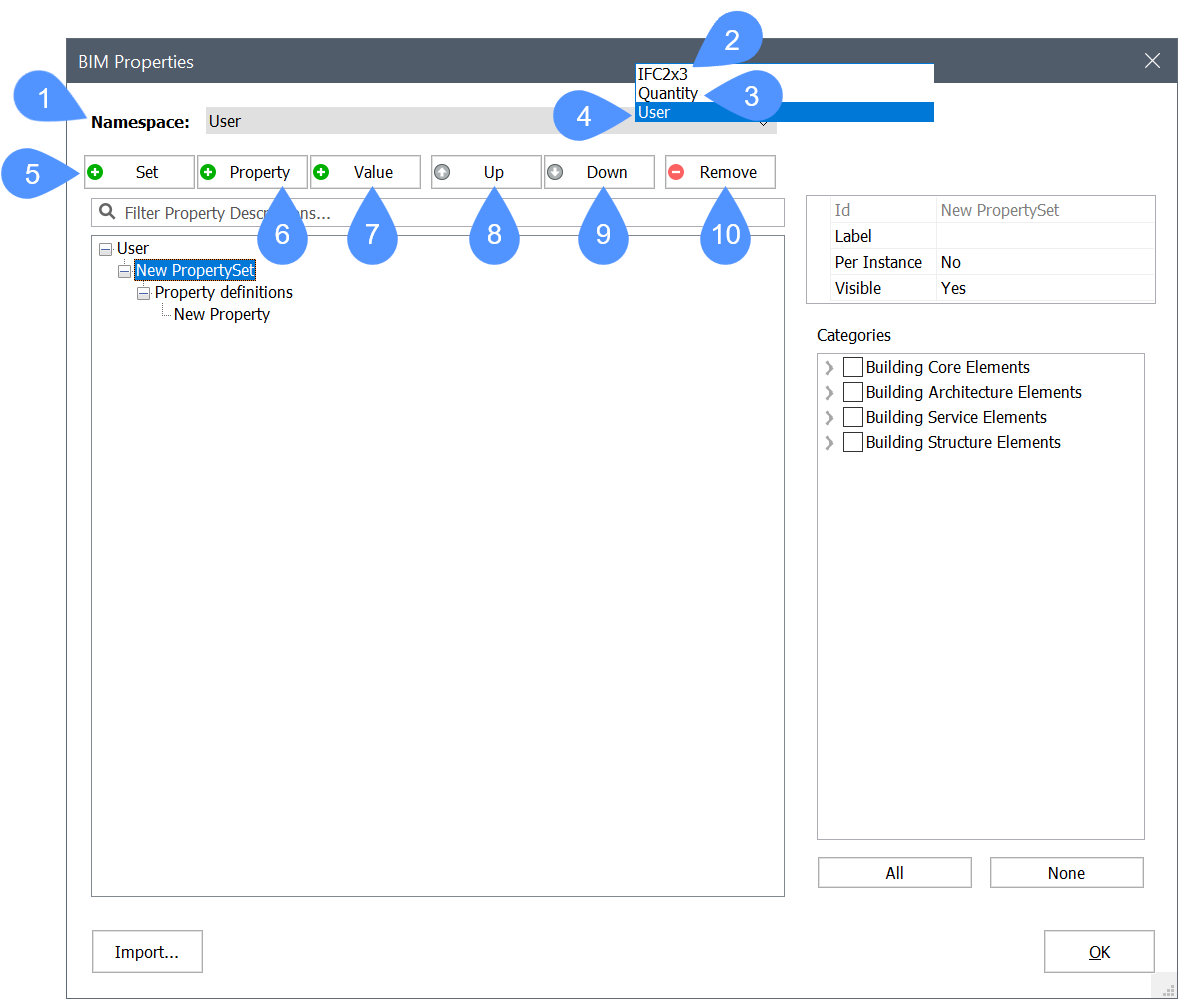
(1) Namespace Groups property sets in namespaces. (2) IFC2X3 namespace Shows the IFC2x3 properties. (3) Quantity namespace Shows some hardcoded quantities
Note: These have been deprecated and replaced by the Quantities in the IFC2x3 namespace.(4) User namespace Shows the custom properties. (5) Add property set button Creates a new property set. (6) Add property button Creates a new property definition. (7) Add value button Creates a new value definition. (8) Move up button Moves the selected property or value up the list. (9) Move down button Moves the selected property or value down the list. (10) Remove button Removes the selected property set, property definition or value definition. - To create a custom property set, select the User
option in the namespace drop-list, then click the Add Property Set. A new
property set is added to the User space. To edit the
property set do the following:
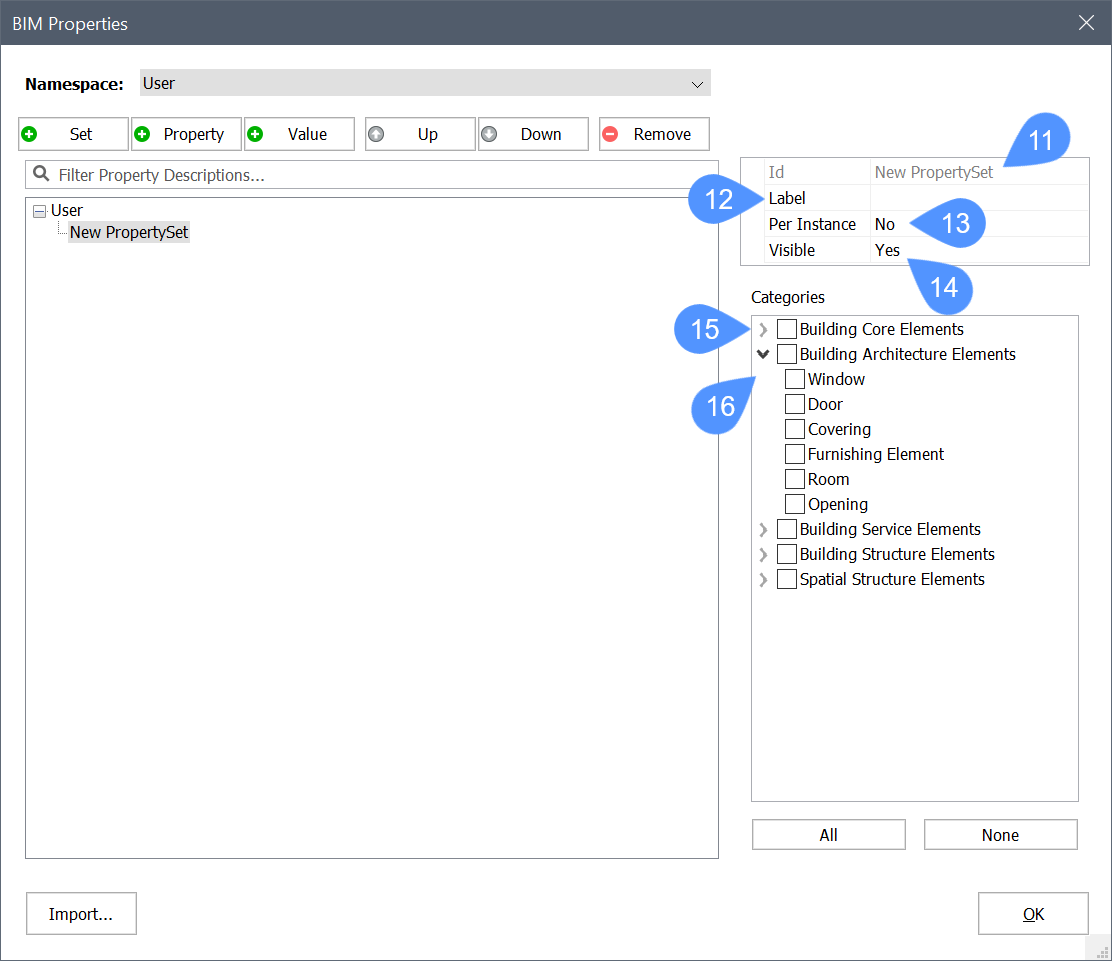
- Type a name in the Id (11) field.
- Type a name in the Label (12) field.
The Label name appears in the properties tree. If the Label name is not defined, the Id name displays. The Id must be unique.
Optionally, you can choose to have the custom property be only applied to specific instances (13), and choose the visibility (14).- Select the building element categories (15) the property set applies to.
When you expand one of the categories, a different type of building elements (16) displays, check the box next to its name to associate with the property set. The following illustration shows the BIM Properties dialog box after inserting a new property set.
- To add a property to the currently selected property set, first, select a
property set, then click the Add Property button to add a new property.To edit the property do the following:
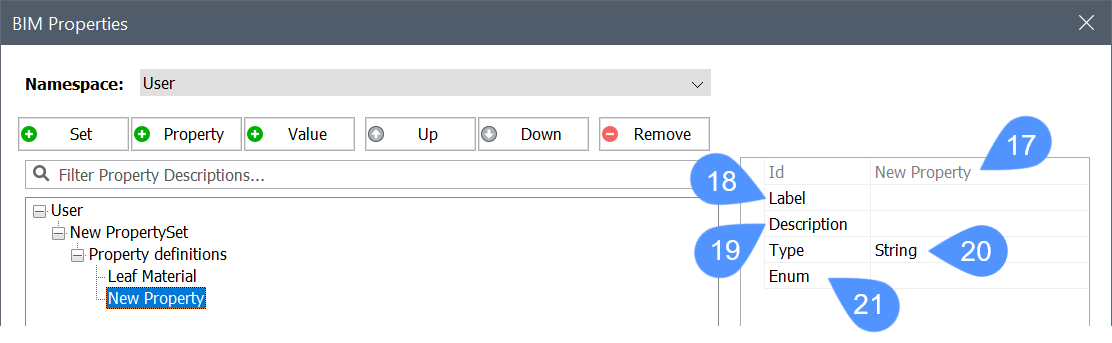
- Type a name in the Id (17).
- Type a name in the Label (18).
- Optionally, type a description in the Description (19).
- Select the property type. The options are Boolean, Integer, Real, and String (20).
- Optionally, define enumerated values (21).
The following illustration shows the BIM Properties dialog box after inserting a new property.
- To remove the property set/property, select a property set/property in the tree, then click the Remove button to remove.
- Press the OK button to accept it.
Now if you select a building element, which is associated with the property set, you will see its newly assigned properties (22) are placed in a new category (23) in the properties panel.
To assign a value to your custom property, select it in the properties panel, then type a new value in its field (24).
